How to Start Using Epoxy Resin for Art
What is Epoxy Resin? And how can it be used for art ?
Imagine you have two separate liquids. When you mix them together, a magical transformation happens: the liquid transforms into a hard, clear, and very durable solid! Epoxy resin art is all about performing this magic!
Epoxy resin is a chemical solution to which when another solution, commonly called as the hardener is added. The hardner acts as a catalyst causing the resin to solidify. The end product is durable, crystal clear and glossy.

Must Know Basics of Resin Art !
For beginning your art journey with epoxy resin, understanding concepts like the right mixing ratio, working time and curing time is crucial. It helps in planning projects in a time-effective manner, avoiding a few mistakes and achieving quality results.
Working Time-
Working time is the gap after the resin is mixed and before it begins to harden. During this period, you can pour the resin into molds, add pigments, sprinkle decorations, and create patterns and designs . The duration of the working time varies depending on the type of resin used.
For example, epoxy art resin typically has a working time of 30 to 45 minutes, while other types like deep-pour epoxy allow for a longer working period.
Curing-
Curing refers to the transitioning process , during which resin becomes liquid or gel-like, eventually into a solid form. This process can take anywhere from 24 to 72 hours depending on the resin type, ambient temperature, and humidity. Know the curing time for the resin you are working with, only proper curing ensures that the final product is durable, non-tacky, and sturdy.
Mixing Ratio-
Getting the right mixing ratio between resin and the hardner is very important. The best practice is to follow any instructions given by the manufacturer.
For example, if you buy OYTRA EPOXY ART RESIN - 2:1, then for every 30 grams of resin, you’ll need 15 grams of hardener. If you buy OYTRA DEEP POUR EPOXY RESIN- 3:1 ratio, for every 30 grams of resin you would require 10 grams of hardener. You can perform this calculation seamlessly by using a Weighing Scale Machine.

It’s ideal to stir for more than 3 minutes in a vigorous fashion. Ensure to scrape the sides, corners, and bottom of the cup for perfect results.
As with any art form, one needs to manoeuvre with patience and enjoy the process. As a beginner, you might encounter setbacks. At first you may fail to finish all the decorations as planned before the resin starts hardening. You might even end up with a rubbery finish despite following proper steps for curing. These mistakes are an inevitable part of the learning curve.
What a true artist always does is keep learning along the way!
Essential Supplies for Beginners-
Basic safety gear: Resin being a chemical solution, when working with it, it is recommended to have a well-ventilated space, hand gloves, and sometimes, safety glasses to protect against fumes and skin contact. A respirator mask too, especially for prolonged exposure and long working hours.
Mixing Containers and Sticks: Silicone or plastic containers as well as paper cups can be used for measuring and mixing. Ice-cream sticks are great for blending the resin and the hardener.
Pigments: There are a vast array of options to add desired color and effects to your artworks- liquid pigment, glitter powder, mica powders, alcohol inks, and glitter. Know the differences and use the one that gives the effects you desire.
Molds: Silicone molds are popular for creating specific shapes for jewelry, coasters and such items. These are flexible, non-stick, highly durable and heat-resistant and allows for easy demolding as well.
Work Surface Protection: A plastic sheet can help you protect your workspace from spills.
Simple Beginner Projects to Try-
These are top 4 DIY ideas that can be performed using Epoxy Art resin 2:1 -
Pick up the resin art project that truly fascinates you and start creating with our beginner-friendly resin art kits!
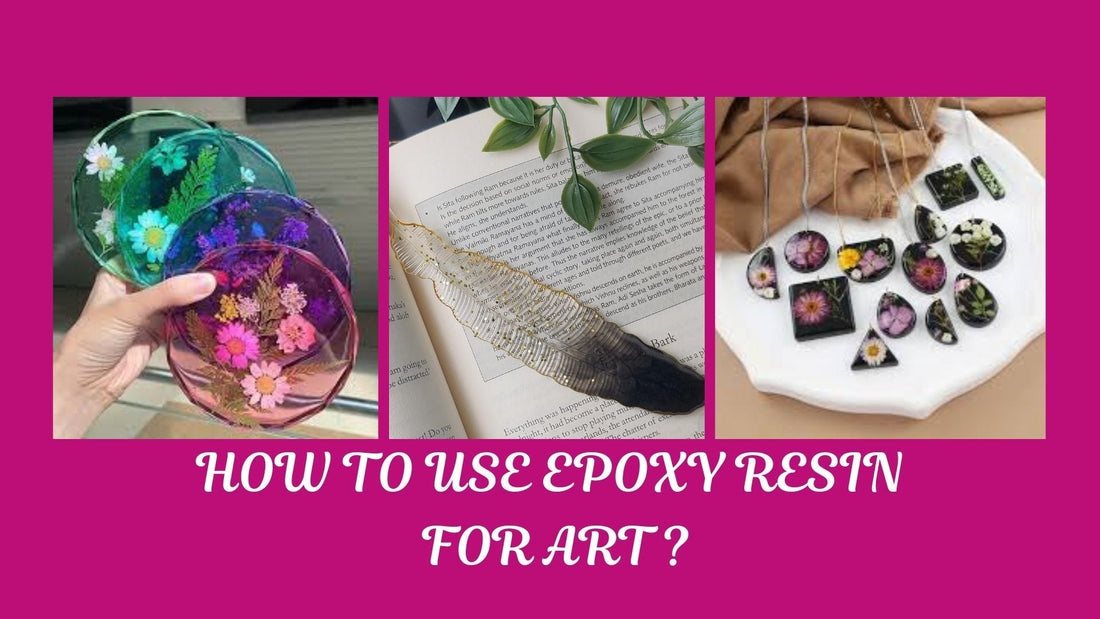
1) Craft your own fashion accessories! -
Resin earrings/necklaces with resin pendants are eye-catching with their vibrant colors and embedded charms.
Materials required - Epoxy resin and hardener, silicon moulds for earring/ pendants, earring hooks/ necklace string , dried flowers, glitter or other tiny decoratives for designing.

CLICK ON THE IMAGE TO BUY RESIN EARRING KIT
2) Elevate your tea time aesthetics!-
Handmade resin coasters can add the much needed charm to your tea sets.
Materials required -Epoxy resin and hardener, coaster moulds, dried flowers, glitter or other tiny decoratives for designing.

CLICK ON THE IMAGE TO BUY RESIN COASTER KIT
3) Every reader’s second most priced-possession next to books- bookmarks!-
Resin bookmarks can be designed into a variety of shapes and designs as the reader delights.
Materials required- Silicon bookmark moulds, epoxy resin and hardener.

CLICK ON THE IMAGE TO BUY FEATHER RESIN BOOKMARK KIT
4) Frame your memories! - DIY resin frames are the best way to preserve your cherished memories with a personal touch.
Materials required- Epoxy resin and hardener, frame mould, decorative lights, stand

CLICK ON THE IMAGE TO BUY RESIN PHOTO FRAME KIT
With the right knowledge and good quality supplies, you can gradually but surely master the art of working with epoxy resin.
If you are curious to experiment and take risks on your own, cherry pick individual items from our wide-range of art supplies like epoxy resin and hardener combo sets, earring moulds, keychain moulds, etc.
At Oytra, we ensure you have access to quality-assured and affordable resin art materials to fuel your creativity.
1 comment
zjr1eg